2026 How to Install Wpc Cladding Wall Panel Effectively?
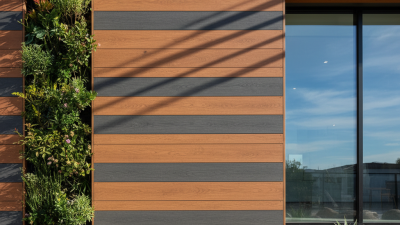
WPC Cladding Wall Panels are gaining popularity for their durability and aesthetic appeal. These panels combine wood fibers and plastic, offering the look of wood but with added resilience. When considering installation, it’s vital to address several factors for an effective and lasting result.
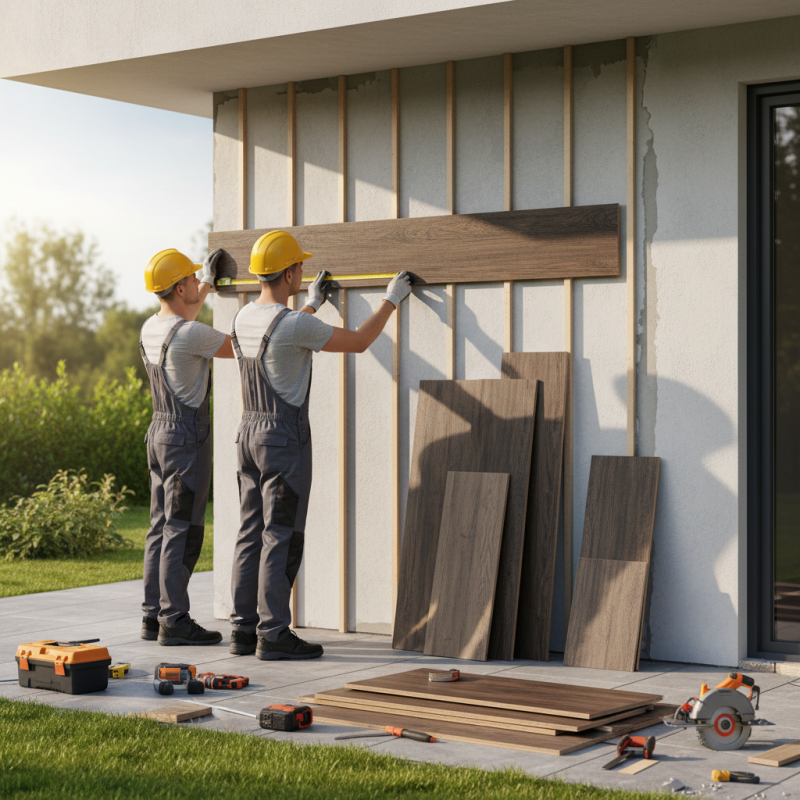
Preparation is key before beginning the installation process. Make sure the wall surface is clean and dry. Measure carefully to avoid unnecessary waste. Using high-quality tools and materials can significantly affect the final outcome. However, even experienced installers can encounter challenges. An unexpected twist in a wall or slight measurement errors can lead to complications.
Once you start, lay out the WPC Cladding Wall Panels methodically. Take your time to align each panel accurately. This step requires patience and attention to detail. Mistakes might occur, but they offer valuable lessons for future projects. Evaluating your work as you go can help ensure the panels are installed correctly. Achieving a flawless finish with WPC Cladding Wall Panels demands both care and expertise.
Understanding WPC Cladding Wall Panel Features and Benefits
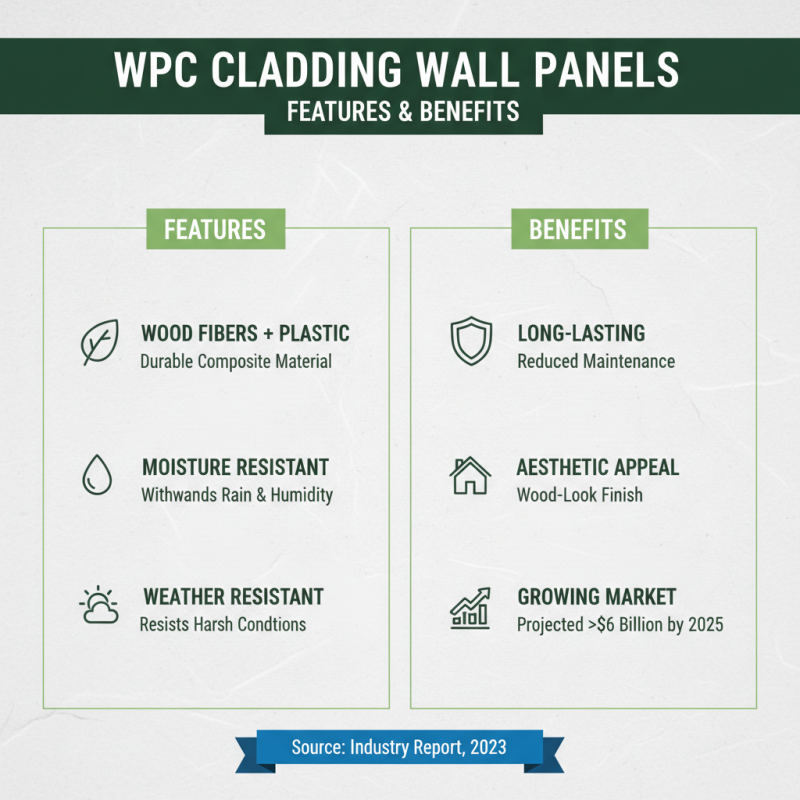
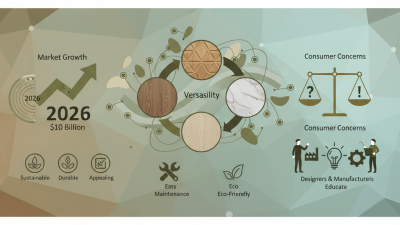
WPC cladding wall panels combine wood fibers and plastic, offering durability and aesthetic appeal. These materials are engineered to withstand moisture and harsh weather conditions. According to a recent industry report, the global wooden plastic composites market is projected to reach over $6 billion by 2025, highlighting their growing popularity.
The benefits are compelling. WPC cladding is resistant to rot and insects. This makes it a smart choice for outdoor applications. Studies show that WPC materials outperform traditional wood in lifespan and maintenance. Homeowners can save on replacement costs over time. Furthermore, WPC materials are often made from recycled components, making them a greener alternative.
Installation can be tricky. Proper alignment and spacing are crucial to prevent warping. It's essential to follow manufacturer guidelines for best results. Some contractors notice challenges in achieving uniformity, leading to aesthetic discrepancies. Careful planning can mitigate these issues.
Tools and Materials Needed for Installing WPC Cladding
When installing WPC cladding wall panels, you need the right tools and materials. Start with a measuring tape, level, and a circular saw. These tools ensure precise cuts and alignments. A drill and screws are essential for securing the panels. Don’t forget spacers for proper gap management. Safety gear, such as gloves and goggles, is also crucial while working.
The choice of materials significantly affects installation quality. Select high-quality WPC panels, which are durable and low-maintenance. Consider using weather-resistant boards for outdoor applications. Your workspace should be clear of clutter to allow easy access to all tools. Mistakes can happen, like miscalculating measurements, so double-check before cutting. Preparing a checklist can help ensure nothing is overlooked.
Installation can be tricky, but with the right setup, you can achieve a polished look. Some may find aligning the panels challenging initially. Taking your time can lead to better results. Aim for consistency in spacing and alignment throughout the process. This will enhance the overall aesthetic and integrity of the wall. Make adjustments as needed throughout to avoid mistakes that arise from haste.
2026 WPC Cladding Installation Costs by Material Type
This chart illustrates the estimated costs associated with different types of materials required for WPC cladding installation in 2026. Composite lumber and PVC panels are the most expensive options, while installation tools and adhesives are relatively low-cost components.
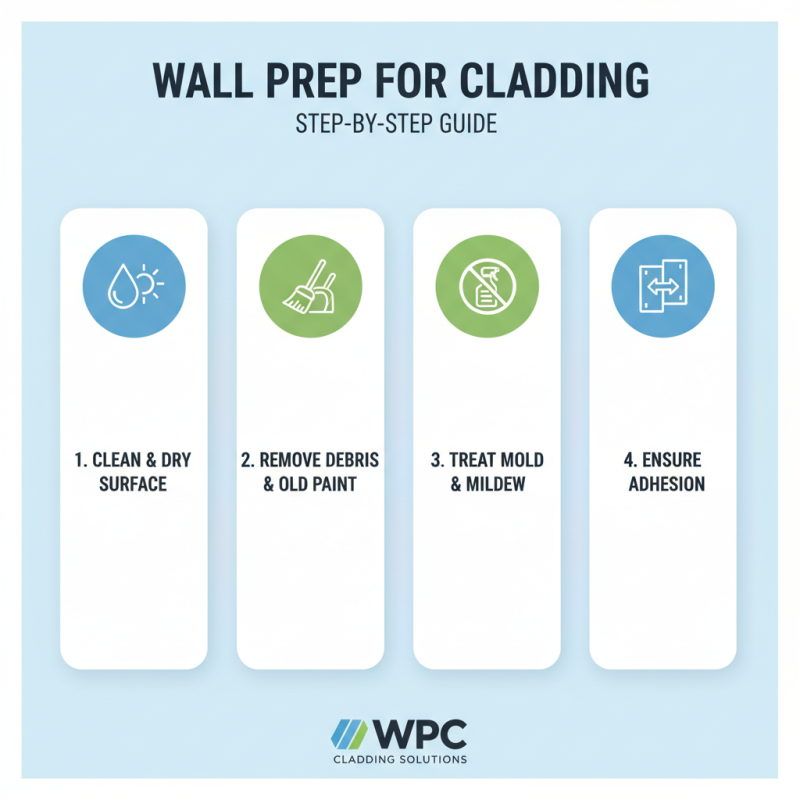
Step-by-Step Guide to Preparing the Wall for Cladding
Preparing your wall for WPC cladding is essential. Start by ensuring the surface is clean and dry. Remove any debris, old paint, or loose material. If you have mold or mildew, treat it before installing. A clean surface helps the cladding adhere better.
Tip: Use a level to check the wall. This ensures that your cladding will be even. An uneven wall can lead to gaps and a poor finish. If you notice significant flaws, consider patching or sanding before proceeding.
Next, measure and mark where the panels will go. Precision is crucial here. A miscalculation can result in wasted materials. Use a chalk line to keep your markings straight. This will guide your installation.
Tip: Always double-check your measurements. Mistakes happen, and it’s best to catch them early. It’s frustrating to deal with cladding that doesn’t fit as planned. Taking your time can save you headaches later. Aim for accuracy—it pays off.
Techniques for Properly Installing WPC Cladding Panels
When installing WPC cladding panels, preparation is key.
Start by measuring your wall area accurately.
Use a level and chalk line to mark where the panels will go. This helps ensure a straight installation. Proper spacers should be used between the panels, allowing for expansion and contraction.
This step often gets overlooked but is crucial for a long-lasting finish.
Next, choose the right fasteners. They should be compatible with both the WPC material and the wall structure.
Using the wrong fasteners can lead to issues down the line.
While many recommend screws, adhesives can also be a reliable option.
However, their effectiveness may vary based on the environment.
Test a small area first to avoid future regrets.
Finally, maintain attention to detail during installation.
Gaps might appear if the panels aren’t lined up correctly.
These gaps can detract from the overall appearance.
Take breaks if you feel rushed; a careful approach is far better than hasty work.
Mistakes can teach valuable lessons, so embrace them as part of the process.
Maintenance Tips for Longevity of WPC Cladding Installations
Maintaining WPC cladding is crucial for its longevity. Regular cleaning is essential. Dust and dirt can accumulate over time. Use a soft brush or cloth to remove debris. Mild soap and water work best for cleaning. Avoid harsh chemicals as they may damage the surface.
Inspect the panels periodically for any signs of wear or damage. Look for cracks or fading. Small issues can escalate if ignored. If you notice something unusual, address it quickly. A little maintenance can extend the life of your installation significantly.
In humid conditions, mold and mildew might emerge. You can prevent this by ensuring proper ventilation around the cladding. Trim any nearby plants that may obstruct airflow. Always follow these simple guidelines, and you'll enjoy your WPC cladding for many years.
2026 How to Install WPC Cladding Wall Panel Effectively? - Maintenance Tips for Longevity of WPC Cladding Installations
| Installation Step |
Tools Required |
Maintenance Tips |
Expected Lifespan |
| Measure and Plan |
Measuring tape, Level, Marker |
Regular cleaning to remove dirt and grime |
15-20 years |
| Cut Panels to Size |
Saw (Circular or Jigsaw), Safety goggles |
Apply a protective sealant every few years |
15-20 years |
| Install Panels |
Drill, Screws, Spacer |
Inspect for damage annually |
15-20 years |
| Finish Edges |
Finishing trim, Caulk |
Keep panels clear of debris |
15-20 years |